In order to add a custom domain to SellShop, Go to Sell The Trend Dashboard and click on your store name. Now go to SellShop settings.
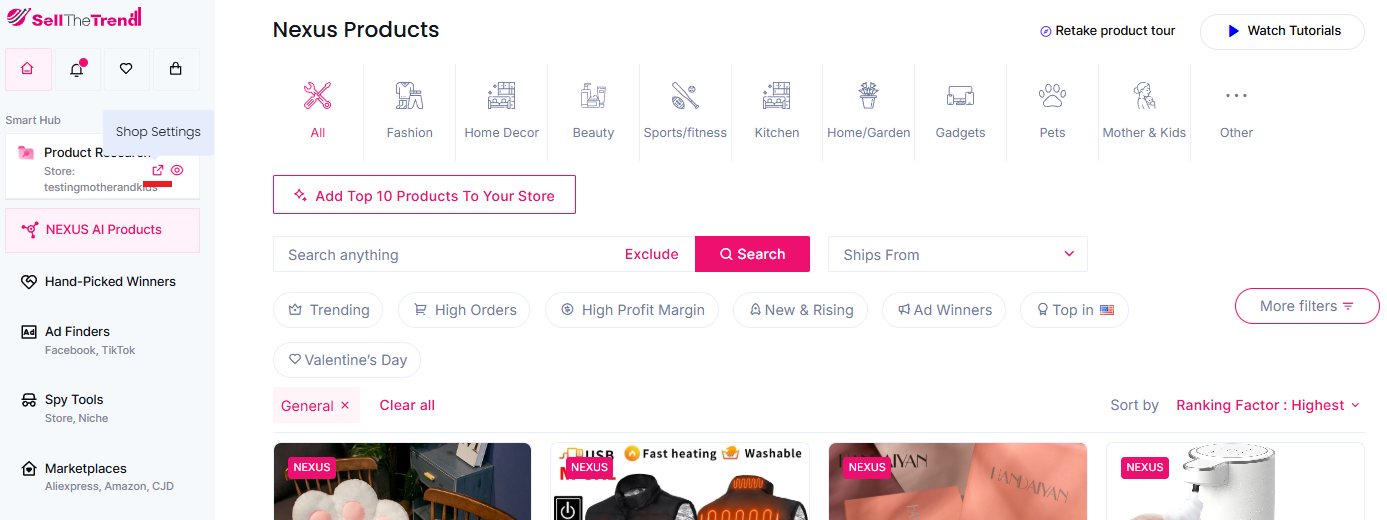
In the General settings, click on the Custom Domain tab. Then click on the Add Custom Domain button.
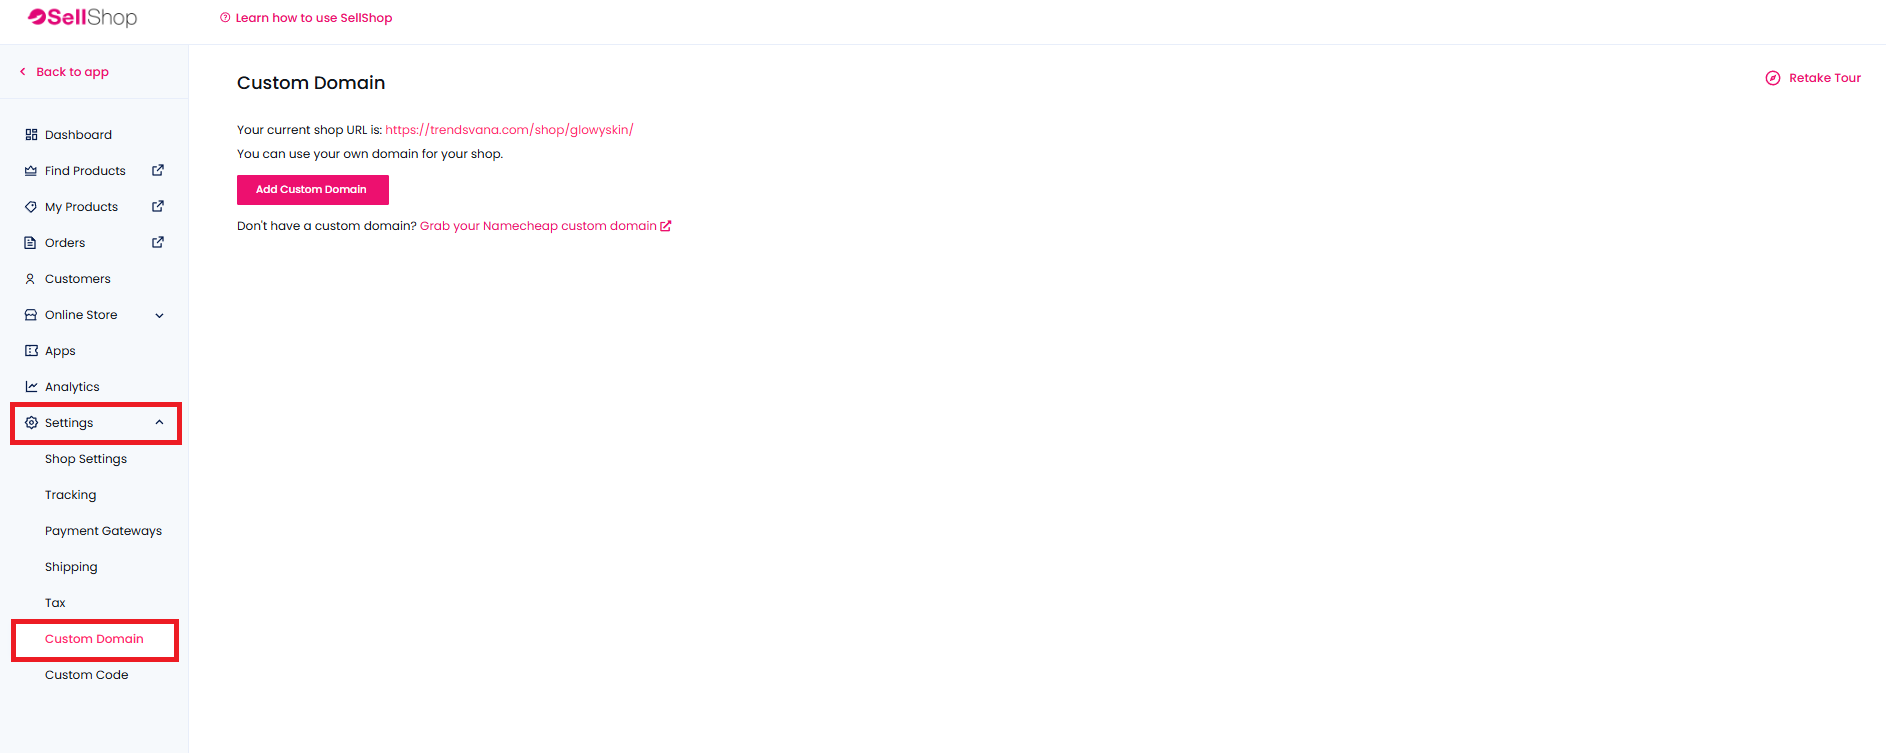
Your free .store domain is included for the first year with SellShop. The setup process is fully automated, so there’s no need to manually edit DNS records or log into your domain provider.
Follow the steps below to claim and activate your domain. if you'd rather add your own domain, and not to grab the free .STORE domain, then skip this section and continue to the "Add Existing Domain Section"
How to Set Up Your Free .Store Domain in SellShop
Follow the steps below to claim and activate your domain.
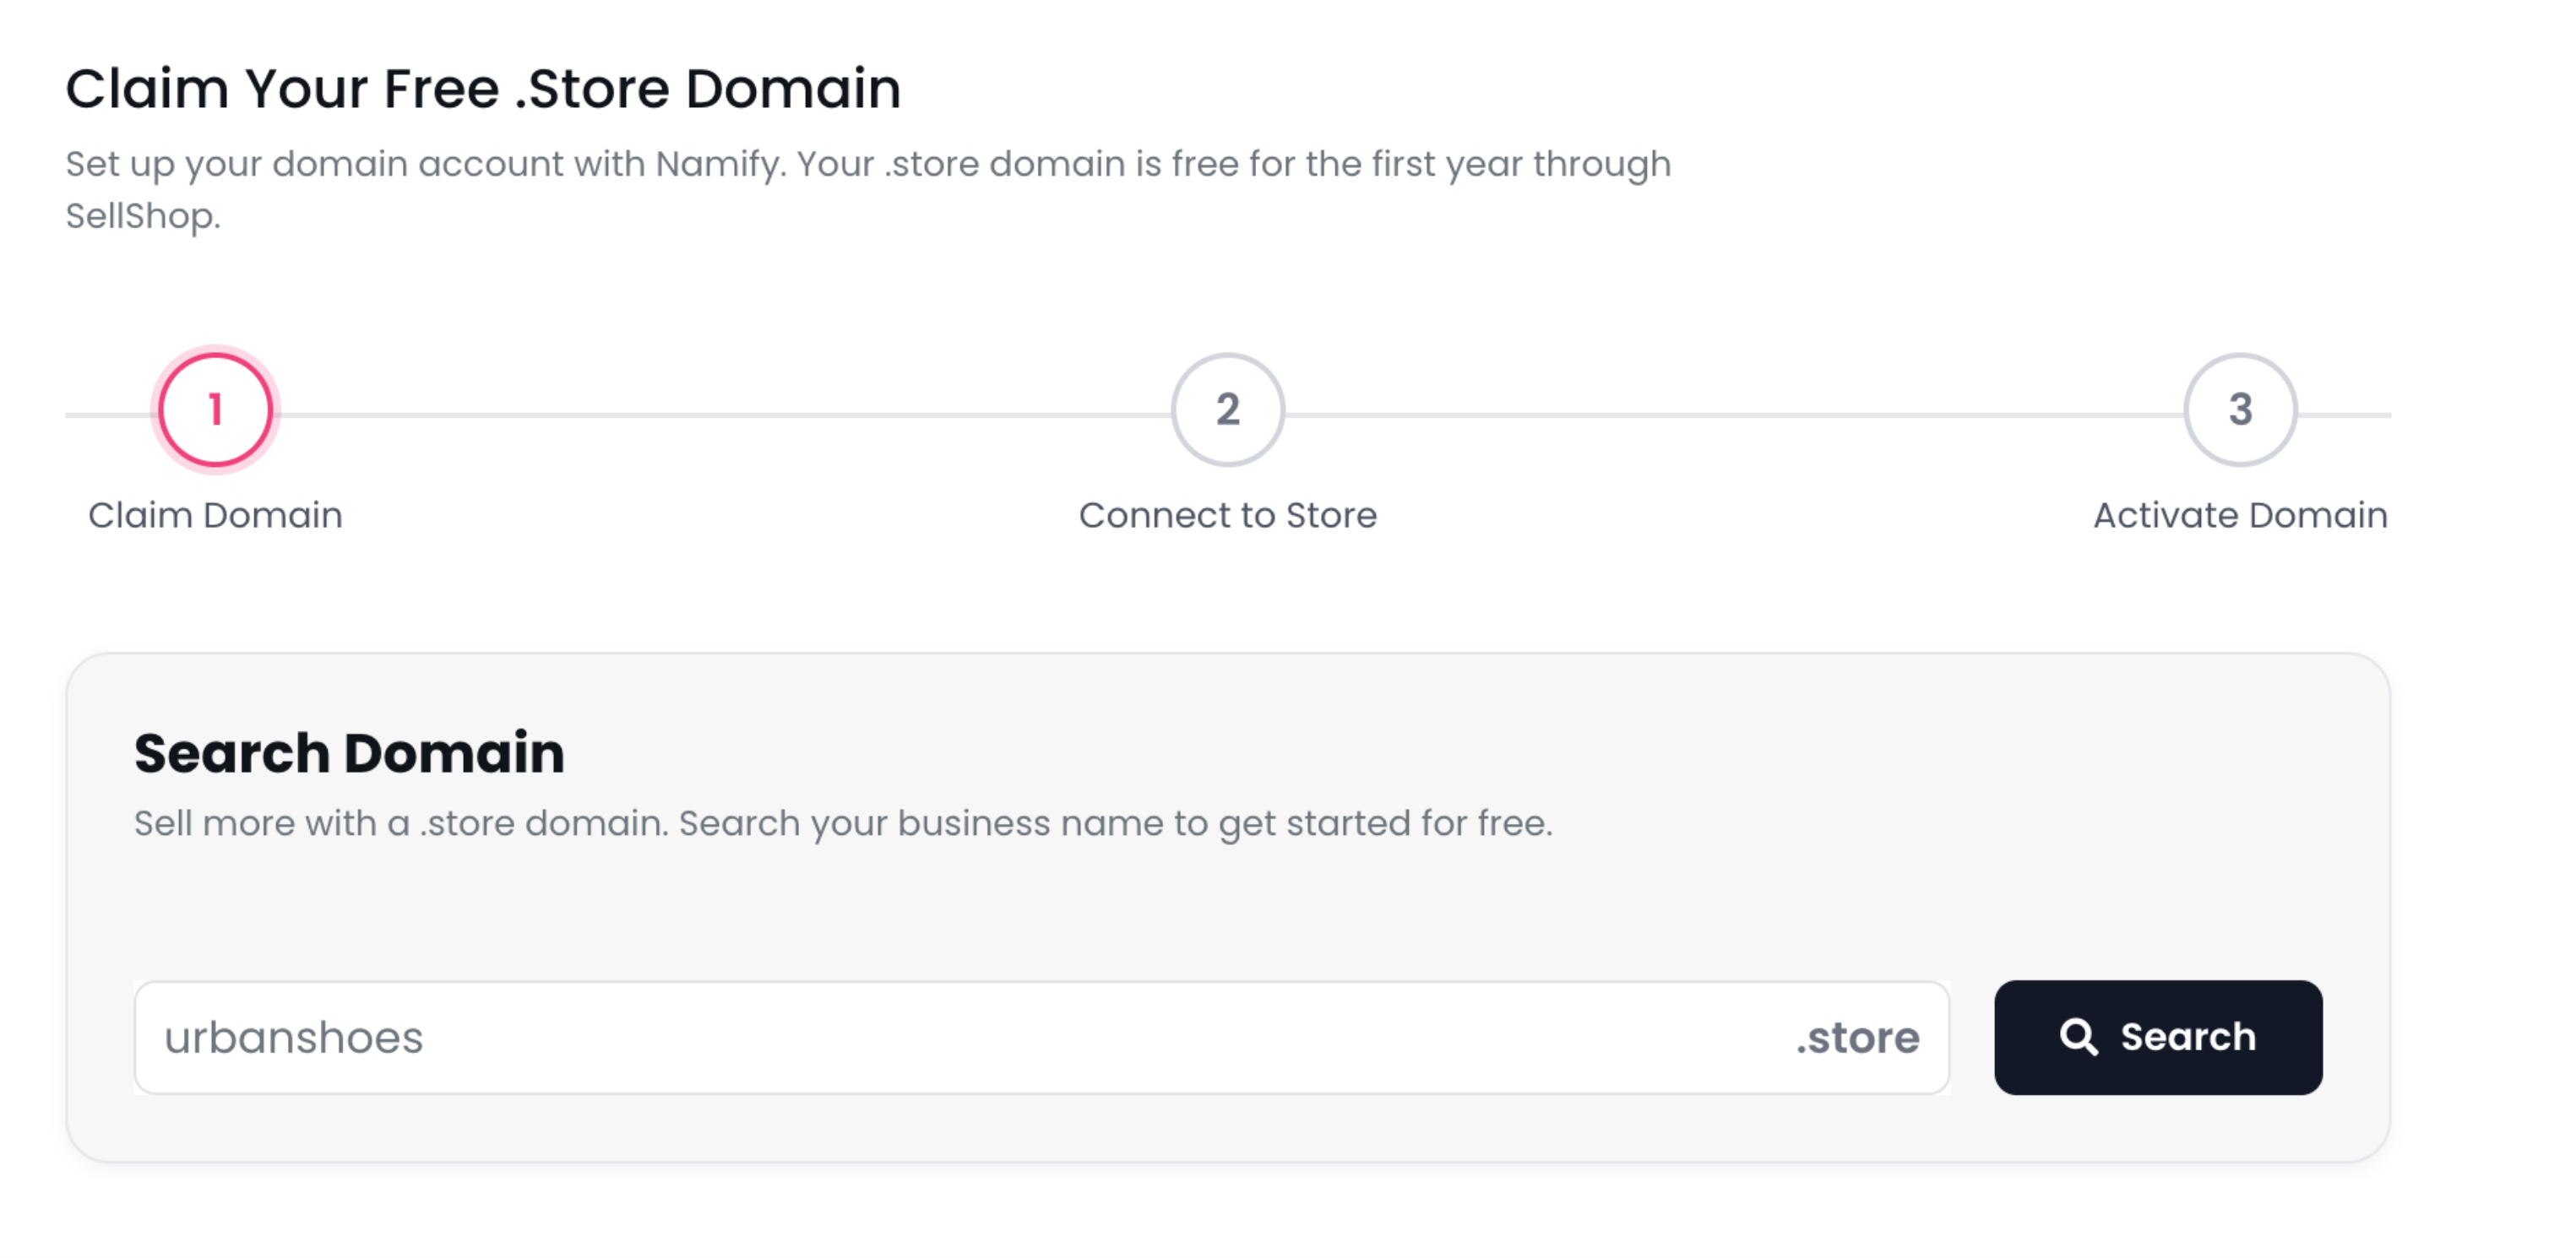
Step 1. Claim Your Free Domain
From your SellShop dashboard, open the Domains section.
Enter the name you’d like to use and click Search.
If your domain is available:
- Check the box to accept the Namify Terms.
- Click Claim this domain.
- Make sure to check the Legal terms checkbox to proceed.
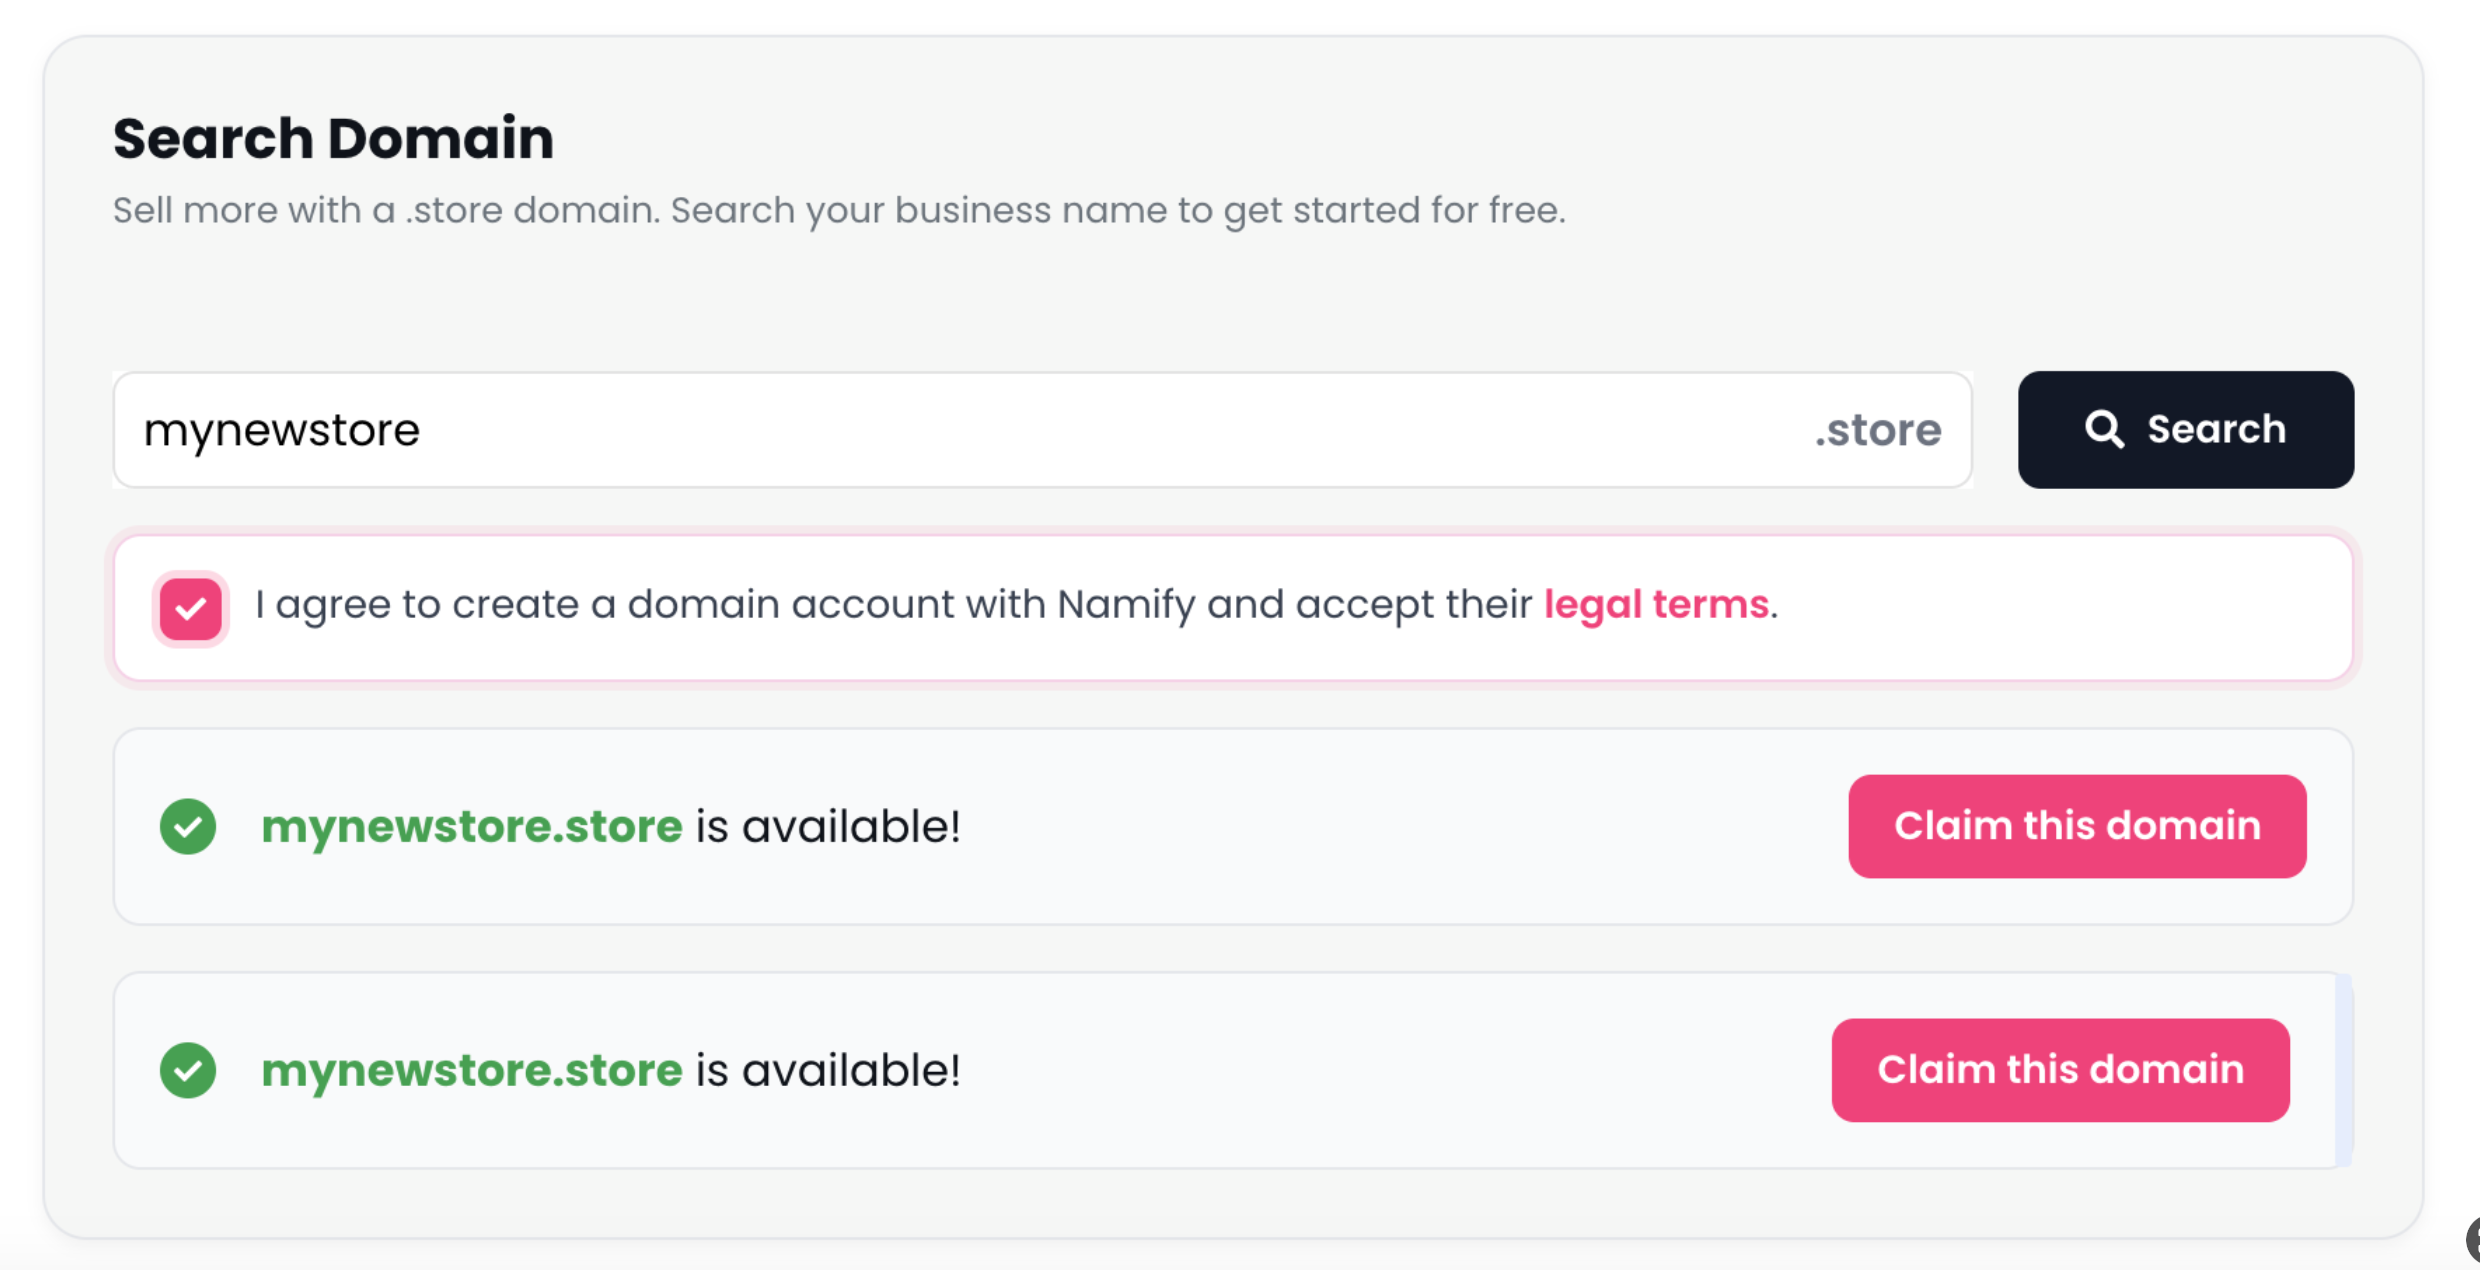
Your domain will now be registered automatically.
Step 2. Connect the Domain to Your Store
Once your domain has been registered, click Connect to SellShop.
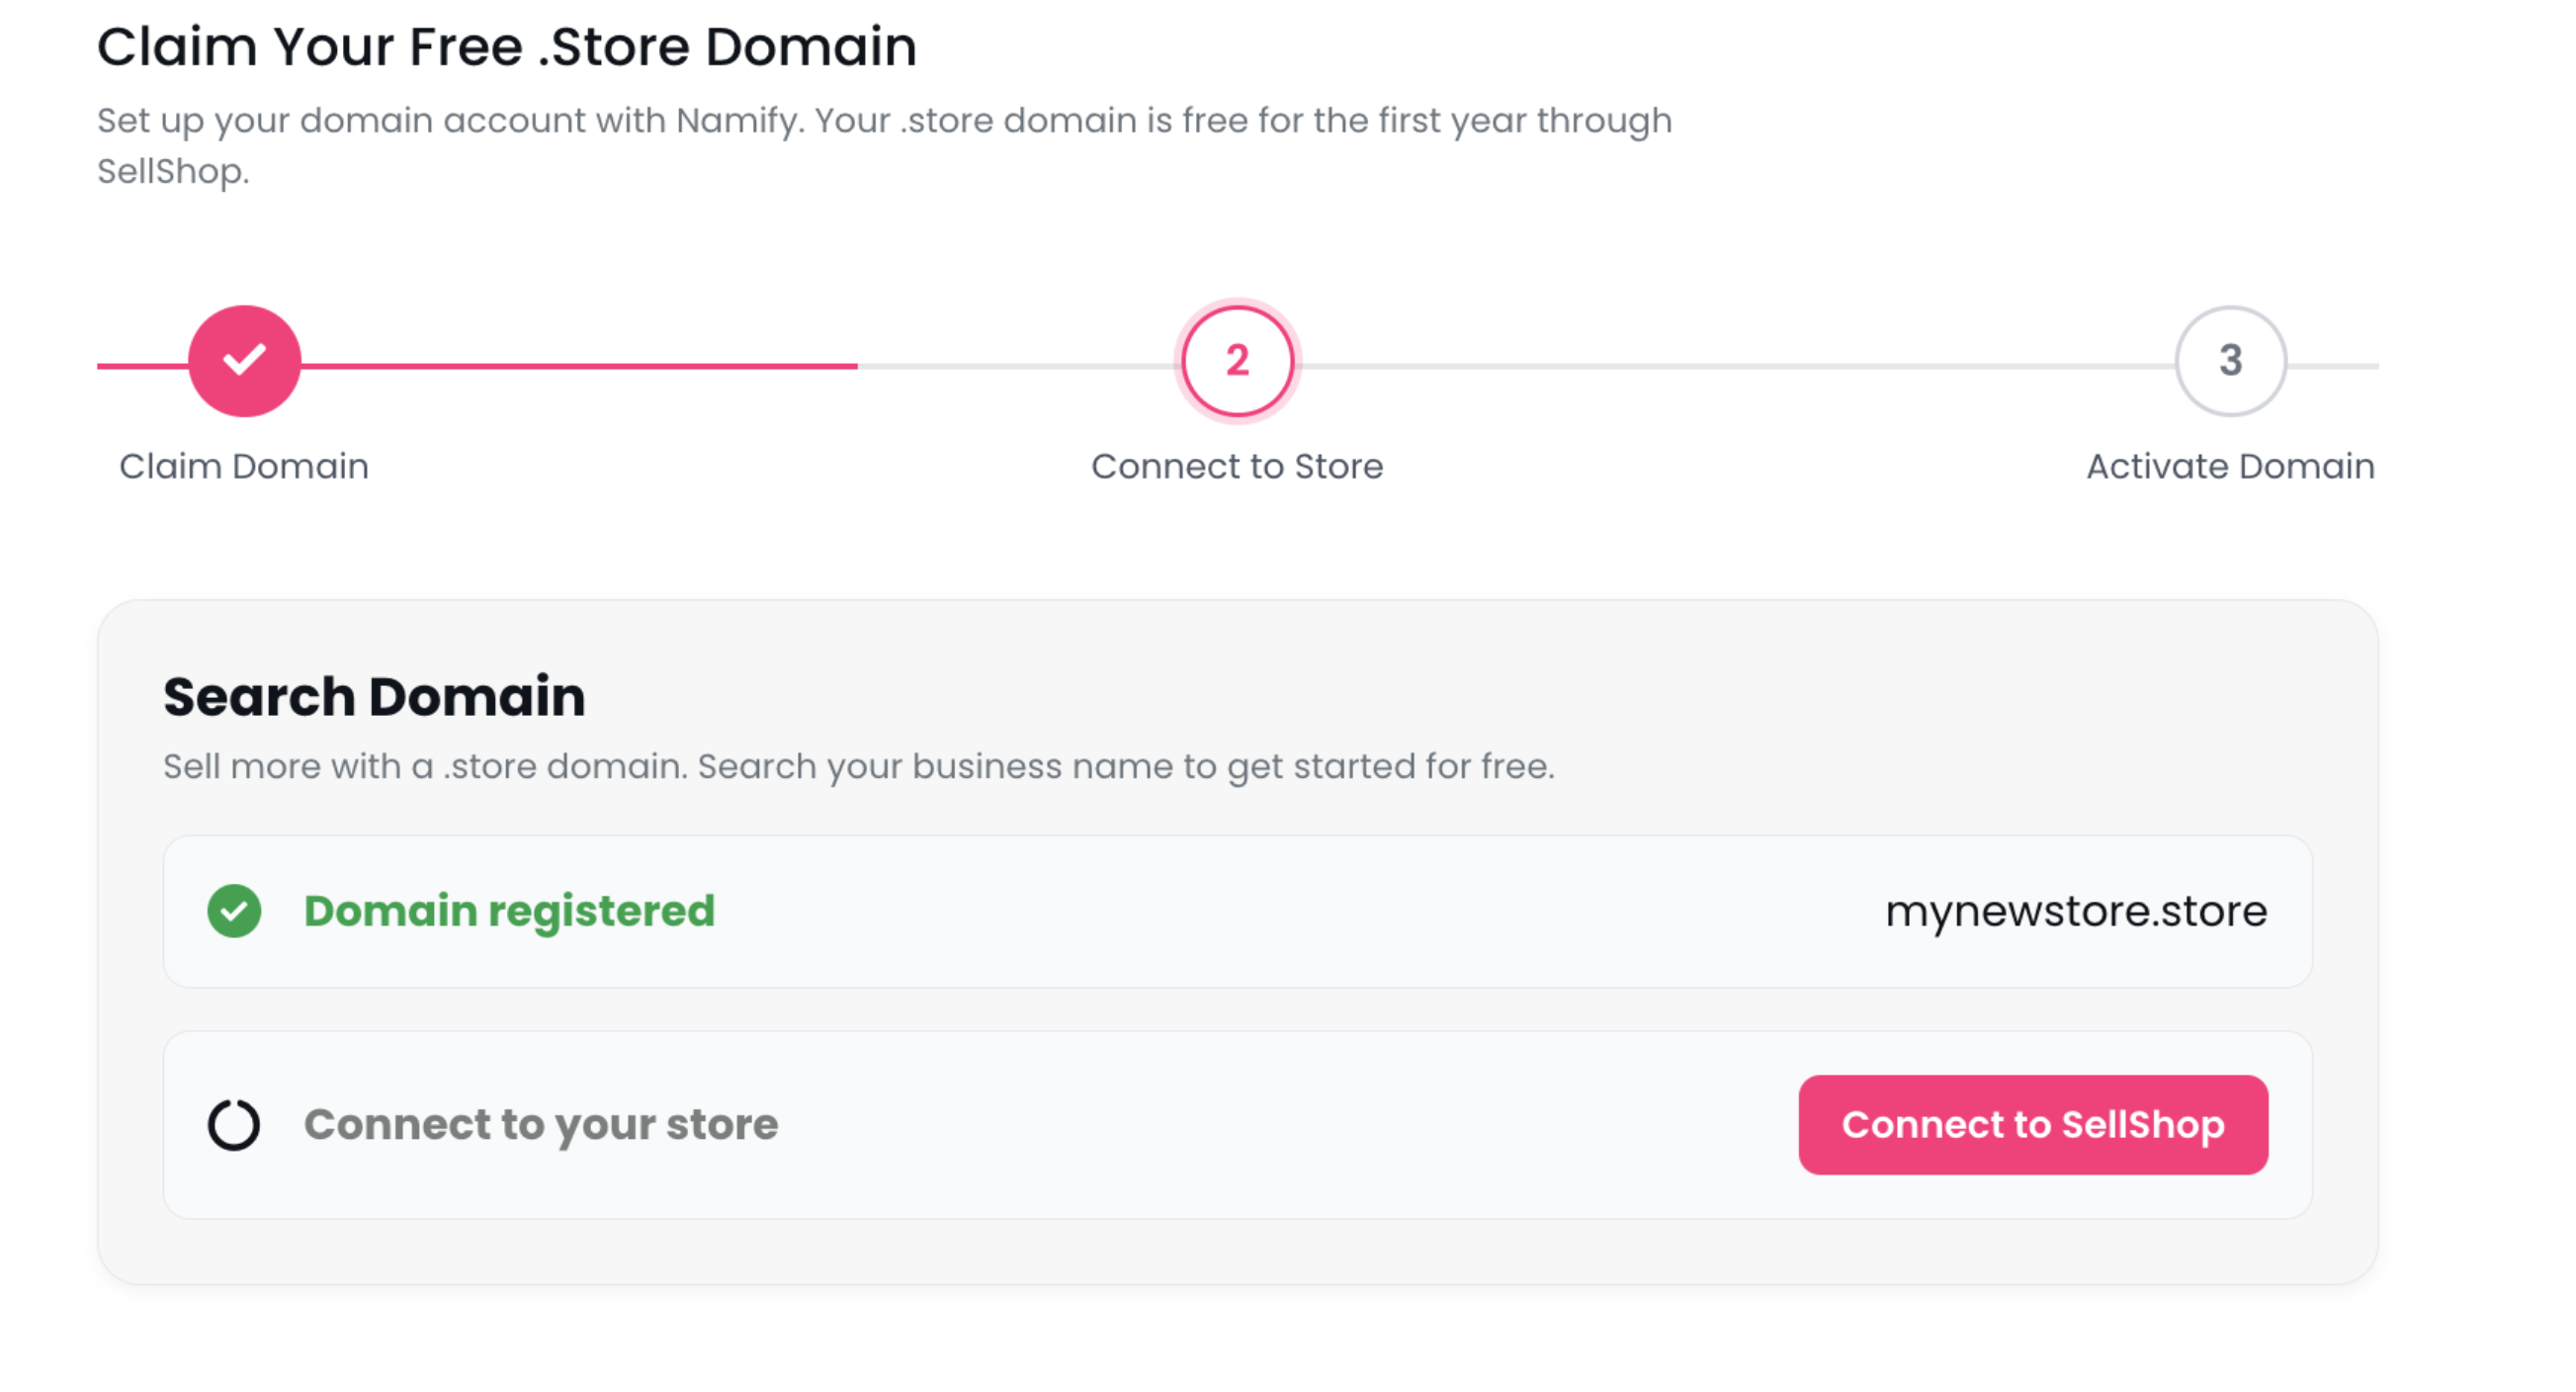
SellShop will automatically connect your domain to your online store.
No additional configuration is required.
Step 3. Activate Your Domain
After your domain has been connected, click Activate Domain.
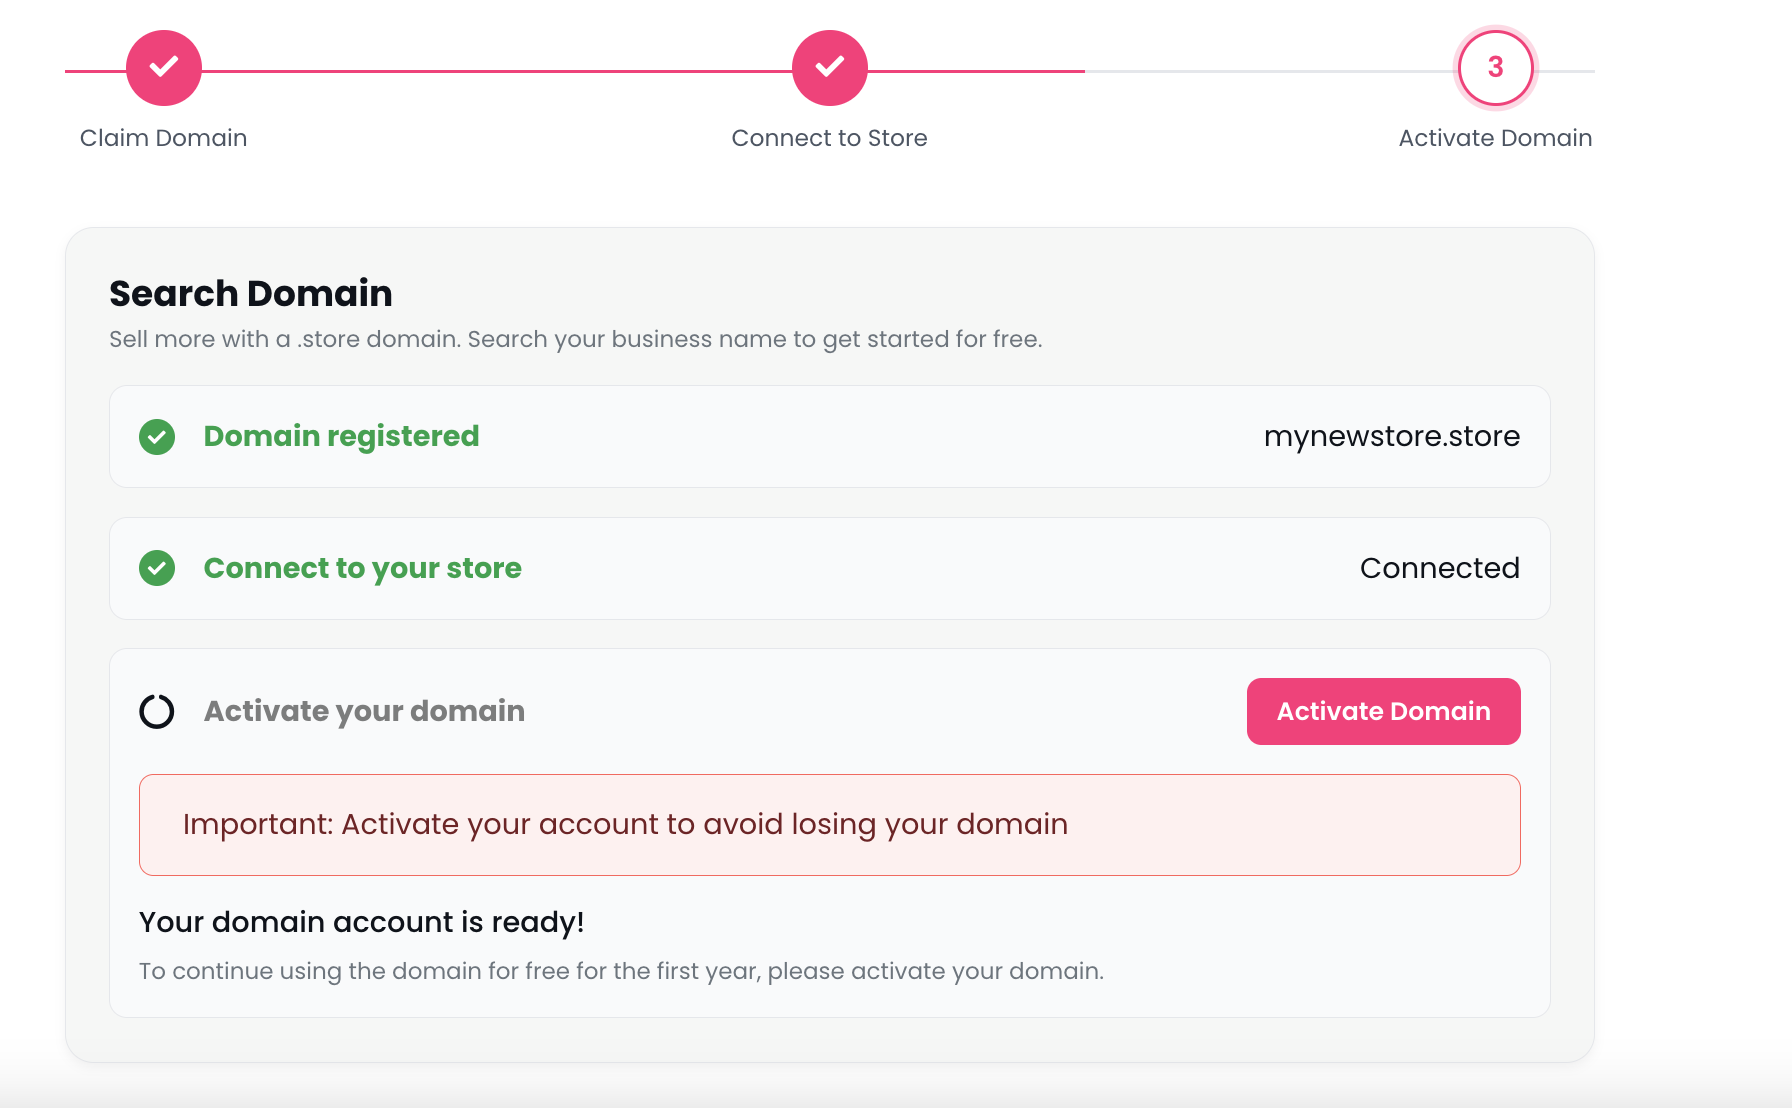
Your domain account has now been created with our domain partner Namify.
Important
To keep your free domain active, you must complete the activation process.
You will be redirected to Namify to finish setting up your domain account.
Step 4. Add a Payment Method
During the activation process, Namify will ask you to add a payment method.
Although your .store domain is free for the first year, adding a payment method ensures your domain can renew automatically in the future and helps prevent any interruption to your website.
After adding your p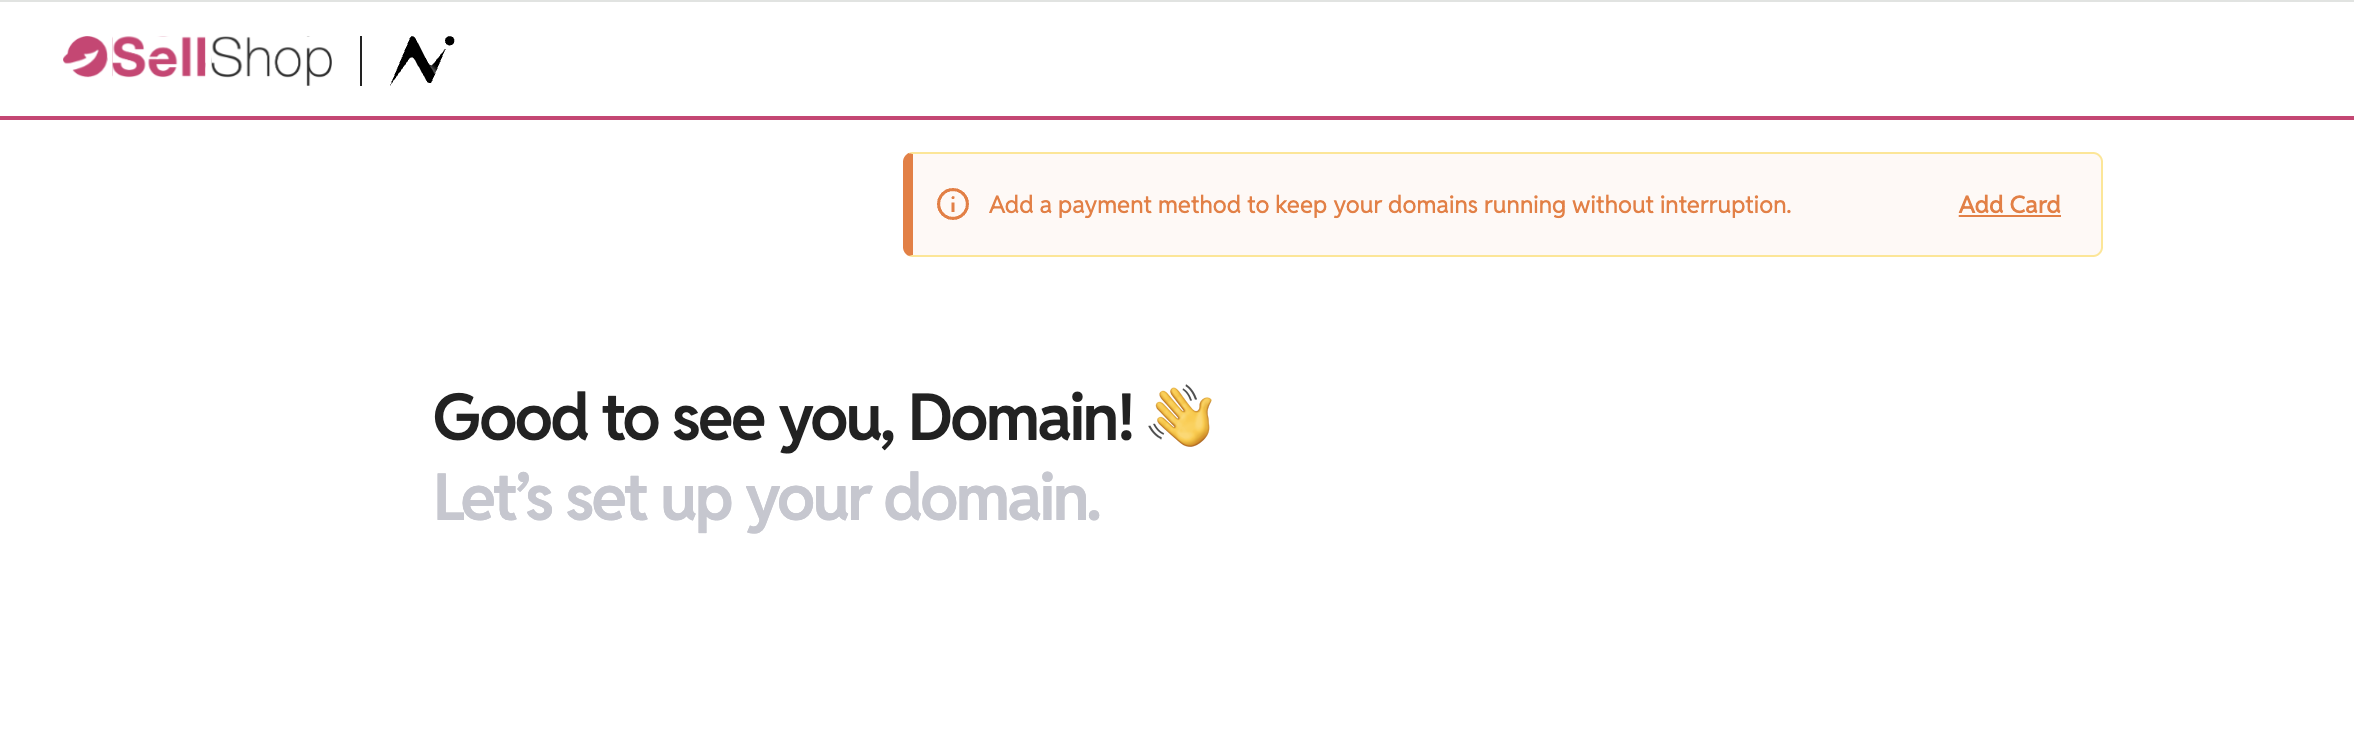 ayment method, return to SellShop and click I’m Finished to complete the setup.
DNS Propagation
Once your domain has been activated, SellShop automatically configures the required DNS records for you.
Please note that DNS changes can take some time to propagate across the internet.
It may take up to 24 hours before your domain is fully live worldwide.
During this time, your website may work in some locations before others. This is completely normal.
Managing Your Domain
You can return to the Domains page in SellShop at any time to manage your domain.
Click Manage Your Domain to open your Namify dashboard where you can:
- View your domain details
- Manage DNS settings
- Update renewal settings
- Review your domain account
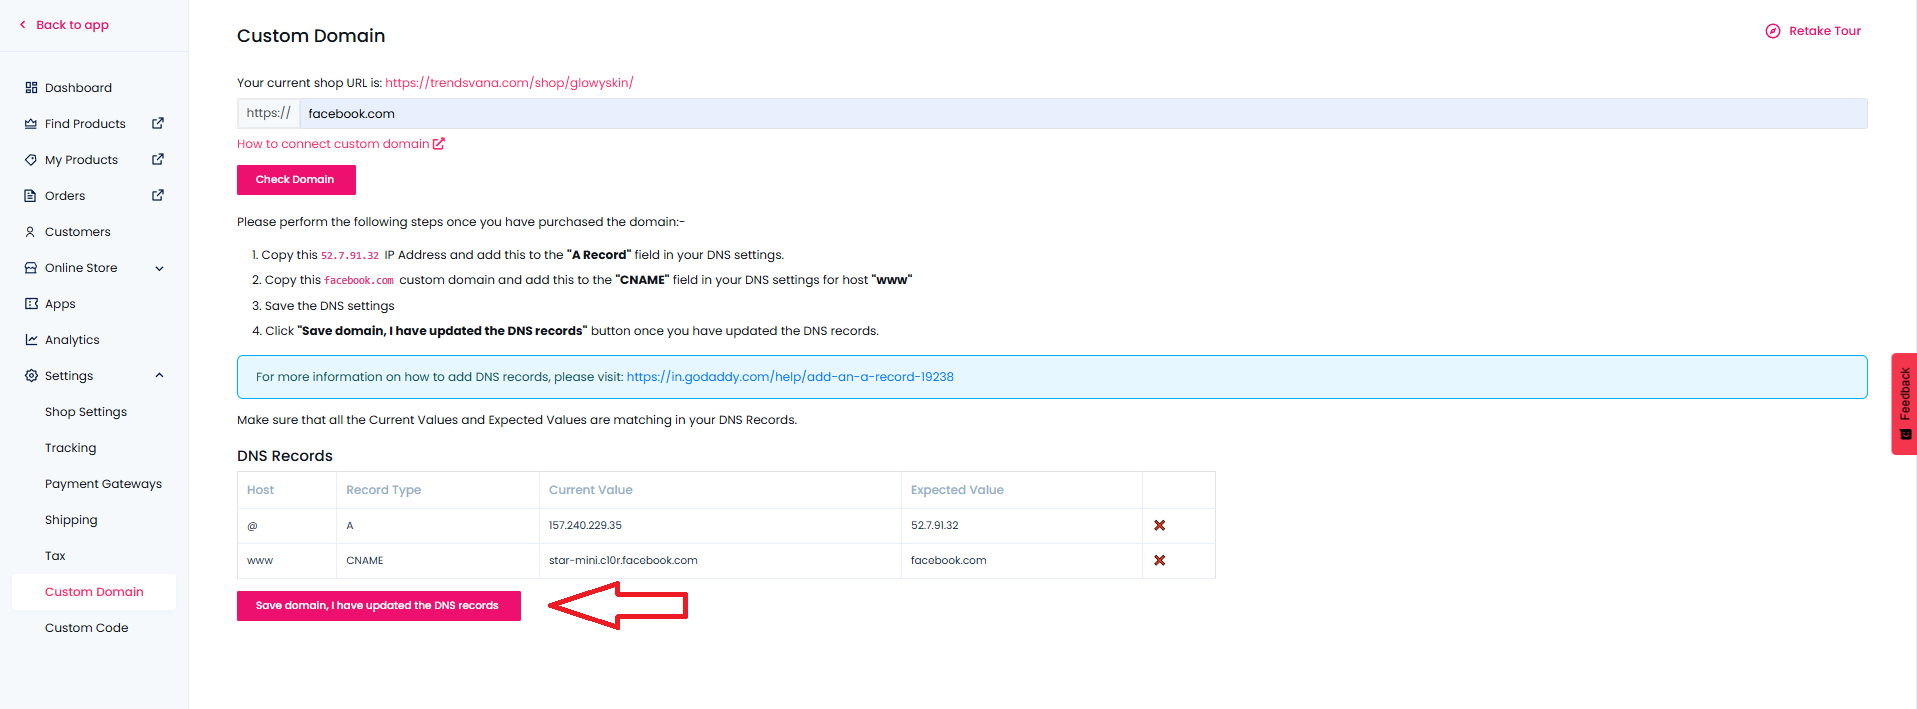
To Add Your Existing Domain
Type in your desired URL and then click on the Check Domain button.
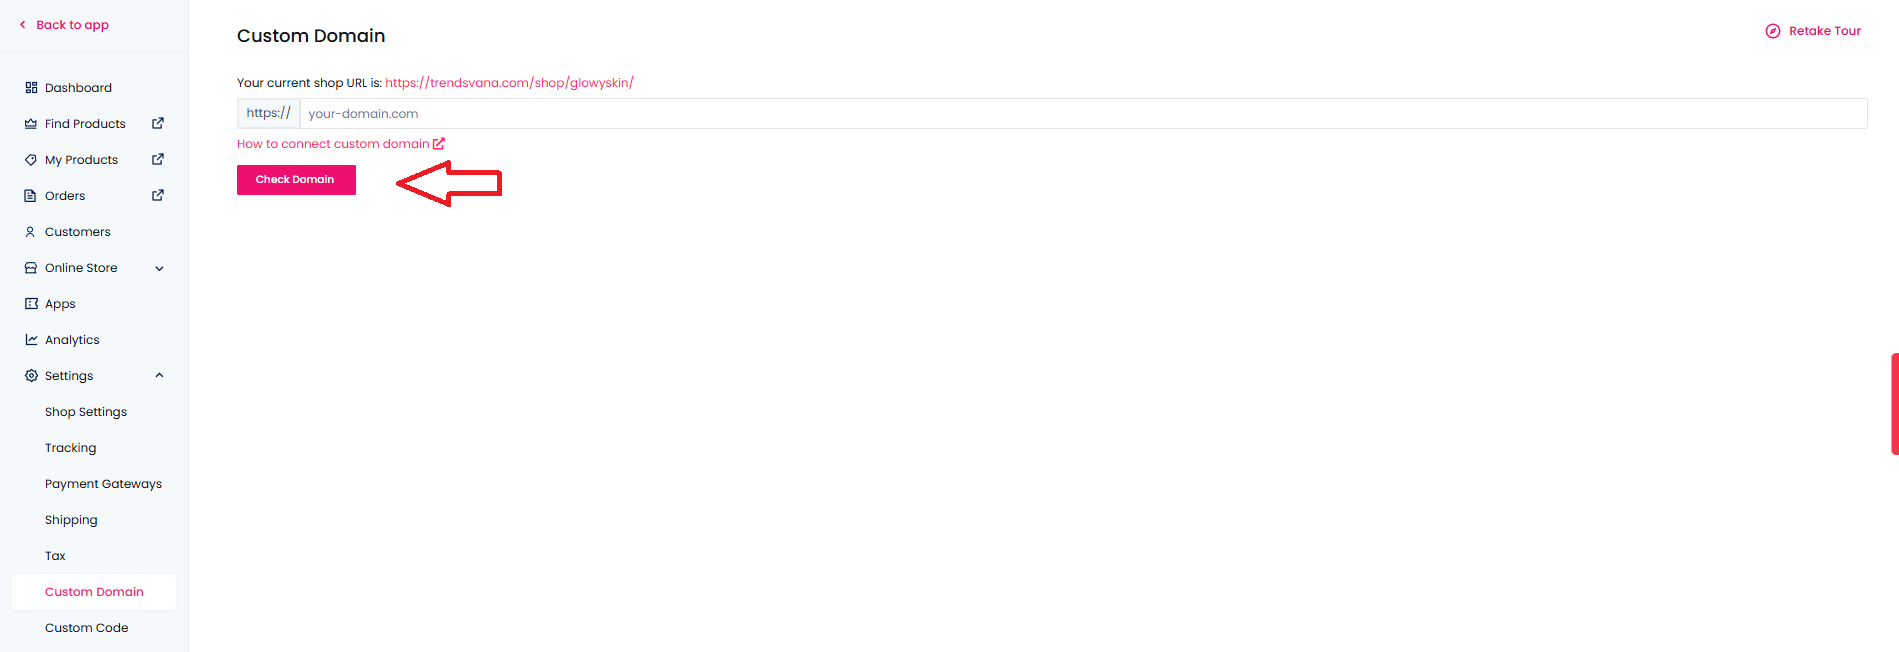
Now you need to add/edit some DNS records in your domain. Go to your domain provider's DNS Management page and add the following DNS records:-
Type | Name | Value |
A | @ | 52.7.91.32 |
CNAME | www | yourdomain.com |
Make sure to replace yourdomain.com with your actual domain name.
If any of these records (A Record for @ or CName record for www) already exist in your DNS settings, edit that with the given values instead of creating a new record.
Namecheap Domains
Similarly, If you are on Namecheap, sign into your Namecheap account and select Domain List from the left sidebar, and click on the Manage button next to your domain.

Then click on the Advanced DNS tab and scroll down to the Host Records section and click on the Add New Record button. Now select A Record Type, www as the Hostname, and paste 52.7.91.32 in the IP address field. Leave TTL value as automatic,

Then add another record CName as Type, www as Host, value as "yourdomain.com" and then save changes.
Now go back to the Custom Domain Section on SellShop settings in Sell The Trend again and click on Save Domain, I have updated the DNS records button.
To check if the custom domain is set up correctly, click on the website link below.
https://dnschecker.org/all-dns-records-of-domain.php.
Was this article helpful?
That’s Great!
Thank you for your feedback
Sorry! We couldn't be helpful
Thank you for your feedback
Feedback sent
We appreciate your effort and will try to fix the article